21 November 2014

All Dressed Up - Abi the Ballerina

Another card from me featuring Abi the Ballerina from All Dressed Up designs! I am so loving their digis!!

All Dressed Up, Abi the Ballerina, Promarkers, Flexmarkers, flowers, gems, blue, CAS, Clean and simple

All Dressed Up, Abi the Ballerina, Promarkers, Flexmarkers, flowers, gems, blue, CAS, Clean and simple


She's coloured with Promarkers/Flexmarkers and I've kept this one super CAS :)
Flowers and Gems - from stash!
Flourish - Memory Box die
Sentiment - Craftwork cards.
I've also added stickles to her dress :)

Thanks for visiting me today :)
If you like what you see please stop by and like my Facebook Page where most of my creations are for sale!

Aquatint Poinsettias

Evening all! 

I had a day off work today and I was baba free so I got a good crack on with Christmas cards! I managed 20 in all so I've got plenty of blog fodder to keep me going for a while ;)

I'm still loving my Spectrum Noir Aquatints, I made the background below using the Pastel set and spritzed it with glimmer mist before allowing to dry thoroughly.
Aquatint, poinsettias, spectrum noir
 I then spread a bit of the ink around on my blending mat and used my Indigoblu Poinsettia stamps to pick up the ink and stamped onto the background.

Aquatint, poinsettias, spectrum noir
I totally LOVE how this turned out and will definitely be trying to recreate this effect in different colours. My new Bright and Beautiful set of Aquatints have now arrived but I didn't use them today as I wanted to concentrate on getting as many cards made as possible and I knew I would just get too carried away if I opened them! Playing will be for another day :)
Aquatint, poinsettias, spectrum noir
I added a stamped woodware sentiment and red gems to the centre of each Poinsettia.

I would like to enter this into the following challenges:

Love to Create - Christmas
Creative Fingers - Anything goes
Polkadoodles - Clean and simple
Dream Valley Challenges - anything goes

Thanks for visiting me today :)
If you like what you see please stop by and like my Facebook Page where most of my creations are for sale!

18 November 2014

Birthday Wishes

Evening all! 
I'm back with another creation, a nice girly birthday card, my favourite thing to make!

I used a stencil, and a stencilling brush to apply distress ink through to the card, added gems to the centre of each flower, and stamped a Woodware greeting.

I would like to enter this into the following challenges:

That Craft Place - Anything goes
Dream Valley Challenges - Anything goes
Creative Fingers - Anything goes
Sister Act Card Challenge - Anything goes

Thanks for visiting me today :)

If you like what you see please stop by and like my Facebook Page where most of my creations are for sale!

16 November 2014

Say it with Flowers

Evening all! I'm truly shattered, in the process of moving my craft room to another room of the house which is slightly bigger with the aim to being able to accommodate my sewing machines and a sewing table in there, as I currently have to sew on the kitchen table which is less than ideal every time we want to have a meal! So most of my spare time the past few days has involved packing, building furniture, and unpacking - my favourite part!

 I can now fit an Ikea Kallax (new name for Expedit) in the new room which will provide tonnes more storage and thus enable me to be sooooo much more tidy and organised! :)

So hopefully I will become more productive on all fronts ;)

I will post a tour when it's in some sort of presentable state!

Today I'm sharing a card I made back in the summer for an 80th birthday, you can't go wrong with something flowery for old ladies!


Recipe:

Image from Lili of the Valley Art Pad
Papers by Basic Grey
Corner die by Whimsy
Sentiment by Craftwork Cards
Embellishments from Stash

Thanks for visiting me today :)
If you like what you see please stop by and like my Facebook Page where most of my creations are for sale!

14 November 2014

More Gelli plate fun

Good morning, I am determined to keep up blogging at least 4 times a week! Let's see how long that lasts, haha!

This is another one from April, made with my Gelli plate. I was obviously having a bit of a messy sesh!!

To make the background I brayered a nice dusky purple Acrylic paint onto my Gelli plate then I used a piece of string to make impressions into the paint before I pulled the print.

The sentiment is a Woodware stamp, and I distressed all the edges, before adding a knotted piece of string to match the string background!

Thanks for visiting me today :)
If you like what you see please stop by and like my Facebook Page where most of my creations are for sale!

13 November 2014

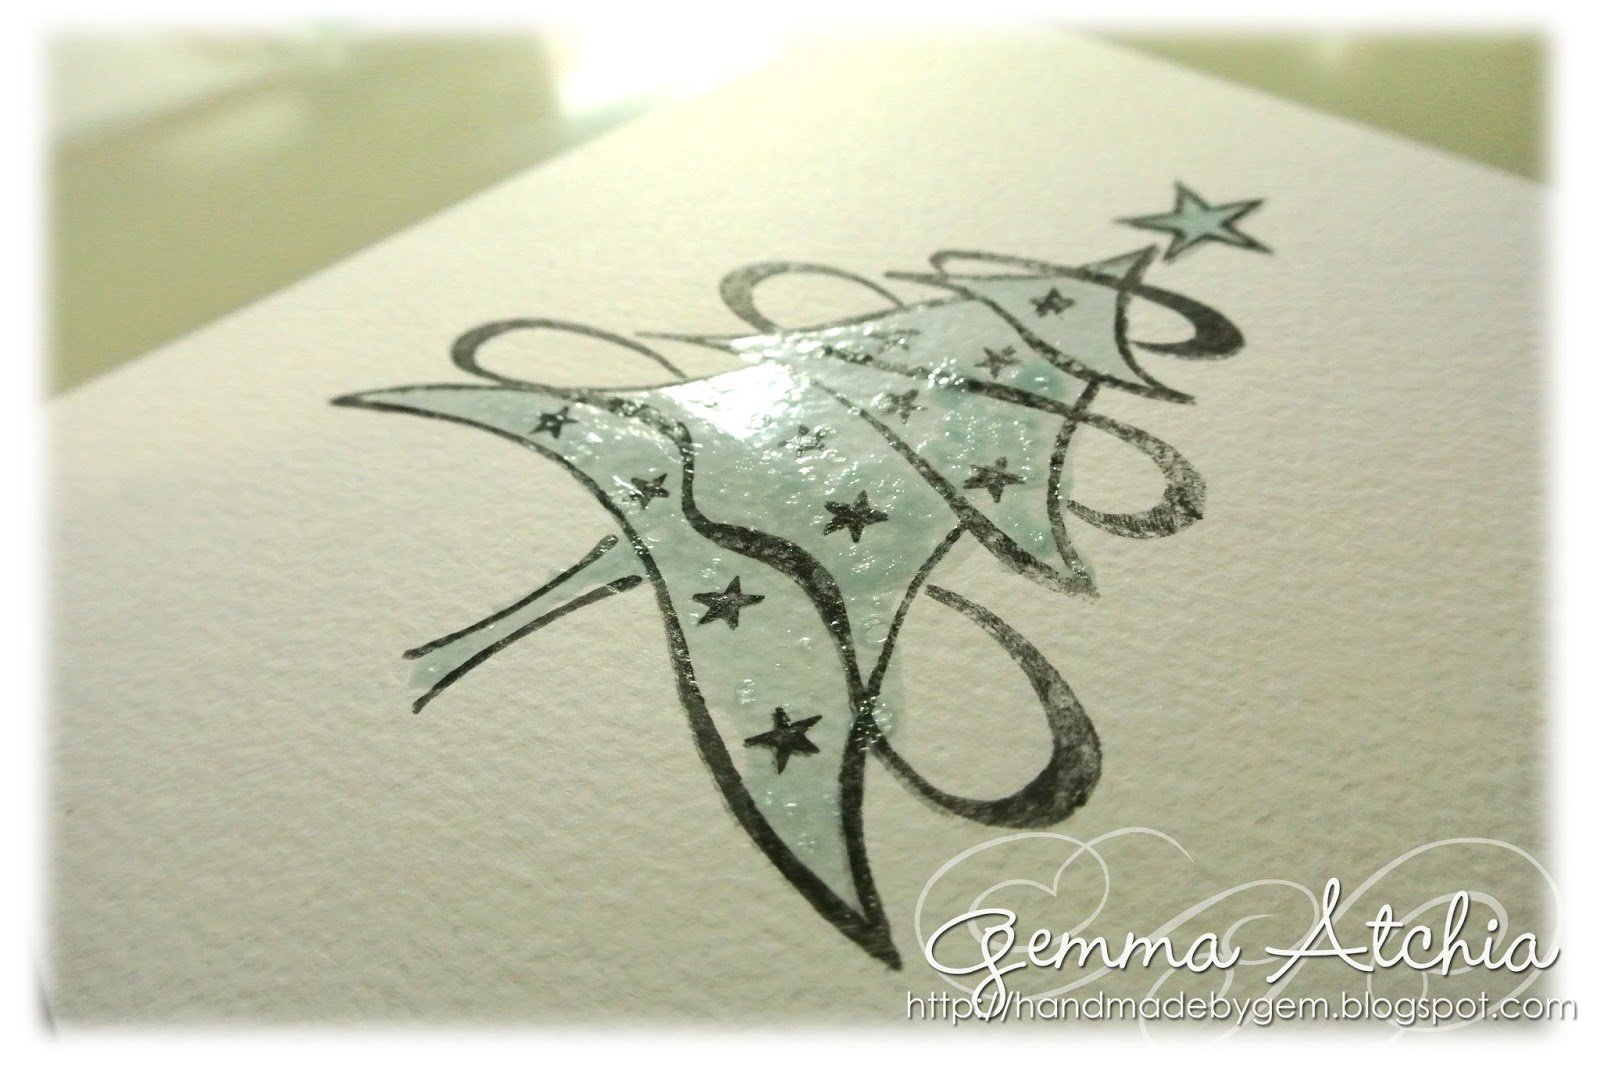
Aquatint Resist Tutorial

Good morning! 


I thought I'd try something a little different for today, I'm sharing my tutorial for a technique I learned from watching Fiona (Crafter's Companion) at the NEC last week.


I am loving my new Aquatints by Spectrum Noir so much, they are so versatile and I've already gone through lots of card trying out different combinations!


This is what you'll need to get this effect:


Stazon, your chosen stamp, watercolour card, Pebeo drawing Gum, a Paintbrush and your Aquatints.


Stamp onto the watercolour card with Stazon ink. 


Paint over the areas of the stamp you wish to remain white with the Drawing gum and allow to dry (about an hour)


Once dry, it will look shiny and be rubbery to touch.

 Using your chosen Aquatints, wash your colour over the entire piece of card and allow to dry. 
I used the pink and gold shimmer mixed together. 


Once the card is fully dry you can then gently rub the drawing gum off the image using your fingers (make sure they are clean!) It comes away nicely without damaging the surface of the card underneath.

You then have a single layer of card with an image which has a coloured background without having to do fiddly painting around the stamp! Amazing stuff!! 

Add some glitter to the stars and the tinsel with a quickie glue pen and glamour dust.


I would like to enter this card into the following challenges:

Crafty Sentiments - Anything Goes

Thanks for visiting me today :)
If you like what you see please stop by and like my Facebook Page where most of my creations are for sale!

12 November 2014

Long time no post!

I thought it was about time I updated my long suffering blog!

Truth is, I just haven't been feeling the cardmaking mojo of late, I've been doing more sewing and dressmaking and something had to give!

I worked at the NEC last week helping out on Samuel Taylors stand, and started feeling it was time to get back into my papercrafting!

So I'm starting off with something I made a long time ago but never got round to blogging!
(The datestamp on the file is 11th April!!)
This background was made with my gelli plate, a brick wall mask and a clock mask. 
I love how you can only just make out each of the patterns, nice and subtle.
I stamped a woodware greeting in distress ink and added some Kraft punched butterflies and resin roses. 

Thanks for visiting me today :)

If you like what you see please stop by and like my Facebook Page where most of my creations are for sale!